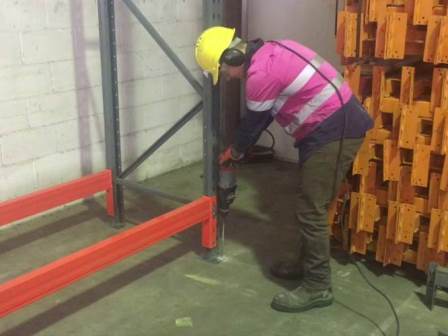
Pallet rack anchoring requirements:
Selective Pallet Rack Installation
- Layout the floor as described.
- Stand the first two uprights in a row and install all beams. Rough plumb the first bay so that the row does not lean too much as the install proceeds. Typically, if only the first level of beams is tightened, it will hold the starter bay plumb. Be sure to loosen these beams when the row is complete and ready to plumb in the down aisle direction.
- Anchor these uprights at the appropriate points on the grid, but only set the anchors halfway into the holes and do not tighten.
- Proceed with the erection of the balance of the row. Install the beams, but leave the connections loose.
- It is recommended that the uprights be anchored as the erection proceeds, but only by setting the anchors halfway into the holes. This ensures that when the rack is cross aisle plumbed, there is enough length left in the anchor bolts to add shims if necessary.
- Once the row is completed, make sure it is anchored, but only set the anchor s half way down.
Storage rack design guidelines
- Make sure the uprights are positioned accurately to the layout grid.
- Shim the rack cross aisle. Place a plumb bob on each upright and shim either the front or rear base plate to straighten the frame. See shimming guidelines & diagram page 9.
- Once the row is anchored and shimmed cross aisle, proceed with tightening the anchor bolts.
- Proceed with the installation of pallet supports and back ties. This can be done at the same time as installing individual bays, but leave the bolts loose.
- With the row anchored, detailed, and plumbed cross aisle, begin plumbing the row in the down aisle direction.
- Attach a cable to the top beam elevation of the first upright on the front or aisle side post, in the row of sufficient length to reach 5 to 6 uprights back at the base.
- Hang a plumb bob, use a transit or a bazooka bob, to determine in which direction the row of needs to be pulled.
Industrial storage Rack design
Check both the front and rear posts of the upright. It is possible that the front post of the upright may need to go in one direction and the rear post in the other down aisle direction.
If this occurs, add additional cables to the rear post as well, to pull the row square.
- Attach a come-a-long to the end of the cable to aid in pulling the row.
- Check the first and last frame in the row and if it is within tolerance, tighten all bolts in the beams, pallet supports and back-to-back ties with the cables in place. If the last upright in the row is out of tolerance, attach a second cable at the rear 5 bays and pull the row in the opposite direction, to eliminate any growth that may have occurred due to the slop in the beam and upright holes and then tighten all bolts in the row.
- If the row of rack is particularly long, this process should take place in 25 bay sections.
- The row is complete once all bolted connections are tight.
Each row of rack should be plumbed in this fashion. If you choose to plumb a back-to-back row down aisle with the back ties installed, you must be sure that all four upright posts are in the line with each other in the cross aisle direction. Both rows must be aligned with each other.
Do not use a 4-foot level to plumb any rack over 10 feet tall. This method is very inaccurate and should not be used.

How to secure pallet racking to the floor?
Pallet storage and pallet rack installation jobs require an experienced crew with the proper tools and equipment. Many people involved in pallet racking jobs don’t really know how to install a pallet rack.

Pallet Rack Inspection checklist
Few warehouse operators have aggressive in-house rack inspection programs in place. Forklift accidents, collisions, dropped or misplaced loads, and other incidents that result in rack damage may or may not get promptly reported.
